
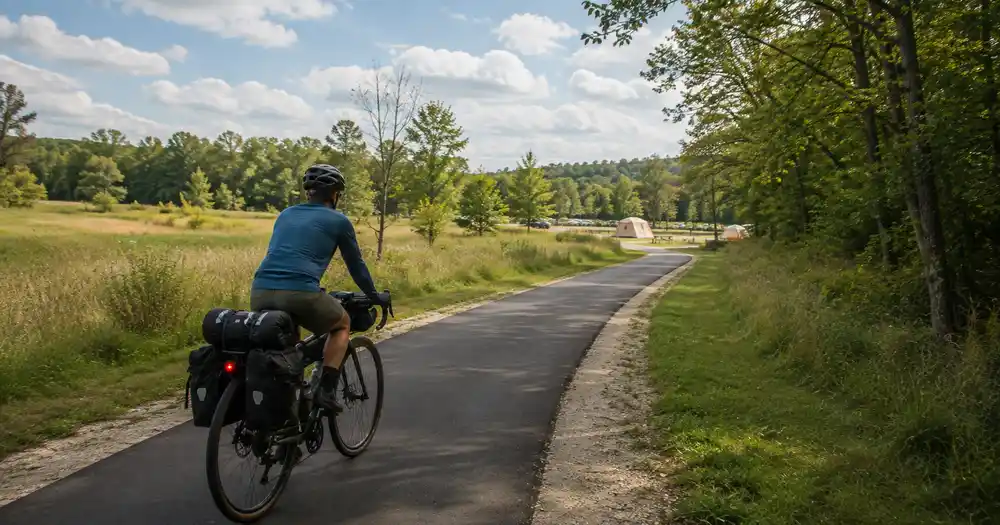
Camping on a Bike: How to Plan Your First Overnight Trip
Camping on a Bike is easier to start when you treat the first trip as a one-night test, not a long-distance expedition. The goal is to learn how your bicycle handles camping gear, how your route plan works in practice, and what you actually need at camp.
For a first overnight, choose a legal campsite, build a conservative route to it, confirm that your bicycle is suitable for the terrain and load, pack essential camping and repair gear, take a fully loaded test ride, and recheck weather, access, water, and campground rules before leaving.
Table of Contents
Camping on a Bike: Start With a Simple Overnight
Bike camping simply combines bicycle travel with an overnight camping stay. Some riders use panniers on roads, while others use compact bikepacking bags on gravel or trails.
You do not need to settle the “bikepacking versus bicycle touring” terminology before your first trip. What matters is whether your bike, route, campsite, and equipment work together.
Treat the first night as a shakedown. Success means reaching a legal campsite with time to set up, handling the loaded bike safely, and learning what to change before a longer trip.
Plan the Campsite Before the Route
Beginners often start by drawing an exciting route and only later look for somewhere to sleep. Reverse that order.
Choose the overnight location first, then build a route you can realistically ride while carrying camping equipment. This reduces the chance of ending the day with an illegal, closed, full, or unsuitable camping option.
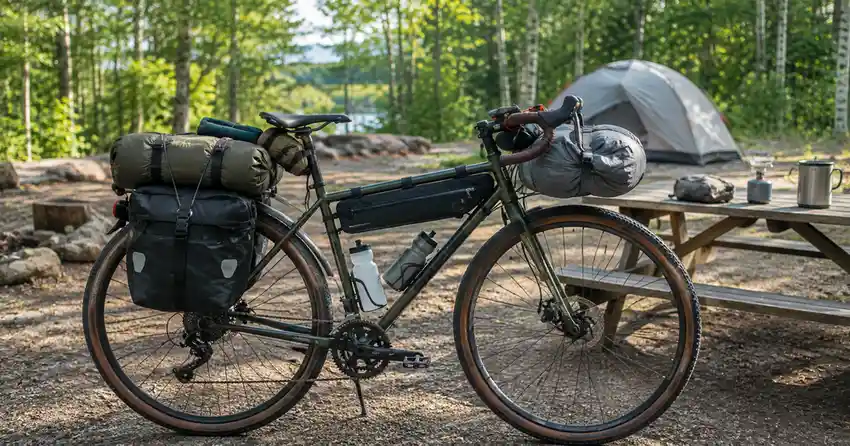
Choose a Legal and Predictable Place to Camp
A developed campground is often a practical first choice because the rules, reservation system, water status, and facilities are usually easier to verify than they are for an improvised overnight stop.
Before committing, check the responsible land manager or campground website for:
- Whether tent camping is allowed.
- Whether bicycles can legally use the road or trail that reaches the campground.
- Reservation or first-come rules.
- Operating dates and closures.
- Potable-water availability.
- Food-storage requirements.
- Fire restrictions.
- Arrival or check-in instructions.
Leave No Trace recommends planning ahead, checking regulations and conditions, traveling on designated routes, and camping on existing or designated sites where appropriate.
Some state park systems have “no-turn-away” provisions for self-supported bicycle travelers when regular campgrounds are full, but these policies are not nationwide guarantees. Adventure Cycling maintains a list of states with such policies and recommends checking the specific rule that applies to your destination.
Give Yourself an Easier First Night
For your first overnight, predictability helps. A campground with confirmed water, straightforward access, and a practical exit option lets you focus on learning the camping system instead of solving several unknowns at once.
How to Plan a Bike Camping Route
A beginner-friendly route is not defined by mileage alone.
Route Difficulty Is More Than Distance
A 25-mile ride on a flat rail trail can feel very different from 25 miles of loose gravel, steep climbing, headwinds, or busy roads. A loaded bicycle will also accelerate, climb, corner, and stop differently from an unloaded one.
REI’s bikepacking guidance notes that how far and how fast you can travel with a loaded bike depends on factors including terrain, distance, elevation gain, and fitness.
When comparing routes, look at distance, elevation, surface, traffic, legal bicycle access, weather exposure, daylight, water and food stops, cell-service gaps, and places where you could shorten or leave the route.
If you want a broader framework for planning a route with realistic backup options, the same basic idea applies to bicycle travel: verify overnight stops, build alternatives, and recheck conditions close to departure.
Use Your Normal Riding as the Baseline
There is no universal “beginner bike camping distance.” Start from what you already ride comfortably.
If a normal unloaded ride leaves you exhausted, adding camping gear and extra climbing will not make it easier. A first overnight should leave enough margin for breaks, meals, navigation errors, mechanical delays, and campsite setup before dark.
A better test than an internet mileage target is a loaded practice ride. Pack the bike as you intend to use it and ride terrain similar to the trip. If the bike feels unstable or the route effort is much higher than expected, shorten the overnight route or reduce the load.
Build a Bailout Plan
Before leaving, know what you would do if you cannot complete the planned route.
Depending on the area, a bailout could be a defined turnaround point, a shorter road, a pickup option, bicycle-friendly public transportation, a nearby town, or a verified alternate campground. Check the details in advance rather than treating a map pin as a complete backup.
Save Navigation for Offline Use
Do not assume cell service will remain continuous. Save the route so you can access it offline, and carry enough information to identify important turns, water stops, the campground, and your fallback option.
Also confirm that bicycles are allowed on every trail or road segment you intend to use. A route suggested by a mapping app is not proof of legal bicycle access.
Do You Need a Special Bike for Bike Camping?
Not necessarily. A beginner can often use an existing bicycle if it is mechanically sound, fits the rider, can safely carry the intended load, and matches the road or trail surface.
NHTSA advises riders to use a bicycle that fits and works properly, and specifically calls out functioning brakes as part of basic preparation.
Before adding camping gear, inspect the tires, brakes, wheels, drivetrain, bolts, lights, and every rack or bag attachment. Set tire pressure using guidance appropriate to your tires, bicycle, and load.
Check the bicycle manufacturer’s manual or official specifications for applicable weight limits. REI’s packing guidance likewise cautions riders not to exceed the bicycle’s stated capacity with rider and cargo combined.
If you cannot confidently assess the brakes, wheels, drivetrain, or load-carrying setup, have a qualified bicycle mechanic inspect the bike before the trip.
How to Carry Camping Gear on a Bike
There is no single correct luggage system. Common options include rear racks with panniers, frame bags, handlebar bags or rolls, seat packs, and combinations of those systems.
Beginners do not need to buy a matching set before discovering what they actually need. Use equipment that attaches securely, fits the bicycle, stays clear of moving parts, and keeps the bike controllable.
Pack Heavy Items Low and Stable
Weight placement changes bicycle handling.
REI recommends putting heavier items in lower, more central storage when the setup allows, while using seat and handlebar bags mainly for lighter, bulkier equipment. Frequently used items such as snacks, maps, and a phone should remain easy to reach.
Keep dense items low and stable, balance panniers reasonably, keep straps away from moving parts, avoid blocking lights or reflectors, and keep frequently needed items accessible. Recheck attachments after the first few miles.
If steering becomes vague, a seat pack sways heavily, or the bike pulls strongly to one side, fix the load before continuing.
Bike Camping Gear for One Night
A first bike camping checklist should focus on systems, not a shopping catalog.
Shelter and Sleep
Bring:
- A tent, tarp, bivy, or other shelter appropriate to the campsite and forecast.
- Sleeping bag or quilt suited to expected nighttime temperatures.
- Sleeping pad.
- Stakes, guylines, and any shelter-specific repair items.
If your shelter uses adjustable lines, practicing basic camping knots for tent and guyline setup before leaving can make setup easier.
Cycling and Repair Essentials
Your exact repair kit should match your bicycle and tire setup, but commonly useful items include:
- Properly fitted bicycle helmet.
- Front and rear lights.
- Pump.
- Tire levers if your setup requires them.
- Spare tube, patch kit, plug kit, or other tire-repair supplies appropriate to your system.
- Multi-tool with functions that match your bicycle.
- Bike-specific small spares that you know how to use.
NHTSA recommends a properly fitted helmet and visibility equipment, including a white front light and red rear light when riding at night or in poor visibility. Local bicycle-equipment laws can add requirements, so check the jurisdictions on your route.
Navigation, Safety, and Camp Basics
Also consider:
- Offline route information.
- Phone or other appropriate communication device.
- Charging cable and a realistic power plan.
- Headlamp.
- Basic first-aid supplies.
- Personal medications.
- Weather-appropriate layers.
- Rain protection when conditions warrant it.
- Sun protection appropriate to the route.
- Toiletries and waste bags as needed.
Do not strip away safety-critical equipment just to make the bike lighter.
What Beginners Can Often Leave Behind
Reduce weight by removing duplicate or nonessential comfort items before buying expensive ultralight replacements. Depending on the campground, that might mean skipping a chair, oversized cookware, extra clothing, or duplicate electronics.
Plan Food and Water Before You Pack
Food and water planning starts with the route, not the grocery bag.
Confirm whether the campground has potable water and whether that water is currently available. Adventure Cycling specifically recommends checking ahead rather than assuming a campground faucet will be working.
Map reliable refill points and carry enough capacity for the longest gap, adjusted for conditions and your needs. Do not treat an unverified creek or campground spigot as dependable drinking water; research treatment if you plan to use natural sources.
For food, a one-night trip can be simple. Ready-to-eat meals may remove the need to carry a stove, fuel, and cookware. If you cook, check current fire and stove restrictions and avoid making dinner dependent on a campfire. Leave No Trace specifically encourages planning cooking alternatives because fire bans or limited fuel can make a campfire unavailable.
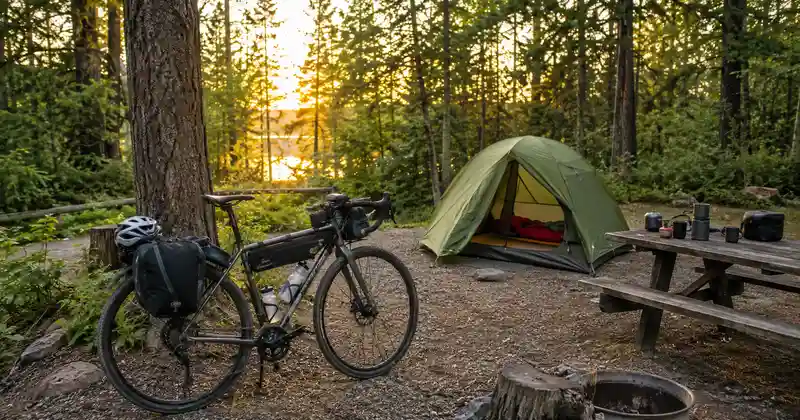
Do a Fully Loaded Test Ride
This is one of the most useful steps in bike camping for beginners.
Pack the bike exactly as you expect to ride it, including water where practical, then take a local test ride. You are testing the whole system, not just your legs.
Test starts, low-speed steering, climbing, cornering, descending, braking, bag movement, heel clearance, straps, tire behavior, and access to water and snacks.
NHTSA recommends practicing riding skills in a safe environment away from traffic, such as a park, path, or empty parking area.
If the bike feels unstable, do not assume you will “get used to it” on the overnight. Repack, remove unnecessary weight, adjust the luggage, or change the route.
Practice the Camping System Before You Leave
Your backyard, living room, or local campground is a better place to discover a missing tent pole than your overnight destination.
Before departure, pitch the shelter, test the sleeping setup and lights, confirm the repair kit matches the bicycle, practice the tire repair you expect to handle, open your route with cellular data turned off, and pack the complete load onto the bike.
Adventure Cycling similarly recommends practicing campsite setup near home before a bicycle-camping trip.
Safety and Conditions for an Overnight Bike Trip
Traffic and Visibility
When road riding is part of the trip, NHTSA recommends planning routes with less traffic and slower vehicle speeds where possible, or using bike lanes and bike paths when appropriate. It also advises riding predictably, obeying signs and signals, and staying alert to surface and traffic hazards.
If a road section exceeds your traffic-riding experience, choose a lower-stress alternative.
Weather
Check the National Weather Service forecast for the entire route and campsite shortly before departure. Wind, heat, cold, heavy rain, and thunderstorms can change how difficult a bicycle trip becomes.
Lightning deserves specific planning because a tent does not provide lightning protection. The National Weather Service advises bicyclists near threatening weather to seek a safe building when one is available and to wait 30 minutes after the last thunder before resuming.
If severe weather removes your safe shelter or exit options, change the trip.
Camping Regulations and Fire Restrictions
Never assume that camping is allowed because land looks undeveloped or public. Verify the land manager, legal camping areas, stay rules, fire restrictions, food storage, and bicycle access.
Leave No Trace recommends camping on designated or existing sites where appropriate and packing out trash and food waste.
Communication and Trip Information
For a solo ride or route with limited services, consider giving a trusted person your route, campground, expected return time, and check-in plan. Match your communication method to actual cell coverage and remoteness.
Common First-Time Bike Camping Mistakes
Avoid:
- Choosing distance based only on an unloaded ride.
- Selecting technical terrain because the route looks short.
- Carrying “just in case” items without considering their combined weight.
- Buying a complete new luggage system before testing what you already own.
- Skipping the loaded test ride.
- Assuming the campground has potable water.
- Relying completely on cell service.
- Starting so late that a small delay forces campsite setup after dark.
- Ignoring road, trail, campground, or fire-rule changes.
- Leaving without a realistic repair or bailout plan.
First Overnight Bike Camping Checklist
One Week Before
- Confirm a legal campsite and reservation if required.
- Verify bicycle access to every route segment.
- Inspect or service the bicycle.
- Plan the route and bailout options.
- Check expected water and resupply points.
- Pack the intended camping equipment.
- Practice shelter setup.
- Complete a loaded test ride.
The Day Before
- Reconfirm campground status and arrival rules.
- Check current weather for the route and campsite.
- Check road or trail closures.
- Check fire restrictions.
- Reconfirm potable water.
- Download navigation for offline use.
- Charge lights, phone, and other necessary electronics.
- Share trip information with a trusted person when appropriate.
Before Riding Away
- Check tires and brakes.
- Secure every bag and strap.
- Confirm front and rear lights work.
- Fill water containers.
- Open the route and confirm navigation works.
- Carry reservation details where applicable.
- Make sure no luggage interferes with steering, pedaling, wheels, brakes, or drivetrain.
Frequently Asked Questions
What kind of bike do you need for camping on a bike?
You do not automatically need a dedicated bikepacking bicycle. For Camping on a Bike, use a bicycle that fits, is mechanically sound, suits the planned surface, and supports you plus the intended cargo within the manufacturer’s limits. Test it loaded before the overnight.
How far should your first bike camping trip be?
There is no single correct distance. Choose a route based on riding you already handle comfortably, then reduce the ambition to account for camping gear, climbing, surface, traffic, wind, stops, and setup time. A loaded practice ride on similar terrain is more useful than copying another rider’s mileage target.
What should you pack for one night of bicycle camping?
Pack a weather-appropriate shelter and sleep system, food and a verified water plan, clothing, navigation, lights, basic first aid, personal medications, and repair equipment matched to your bicycle. Add items required by local rules and skip unnecessary duplicates.
Are panniers or bikepacking bags better for beginners?
Neither is universally better. Panniers can be convenient if your bicycle already has a compatible rack and you are riding roads or wider trails. Bikepacking bags can keep the profile narrower and work well on bikes without racks. Choose a system that fits securely, respects component limits, stays clear of moving parts, and handles predictably when loaded.
How do you keep your bicycle secure while camping?
Start by checking campground rules and choosing a campsite where you can keep the bicycle close. Use an appropriate lock with a permitted fixed object when one is available, remove easily detached valuables, and do not block roads, paths, or neighboring sites. No lock guarantees theft prevention, so match your security plan to the location and risk.
Conclusion
Camping on a Bike becomes much simpler when the first overnight is treated as a controlled learning trip. Pick a legal and predictable campsite, plan a route below your maximum ability, use a mechanically sound bicycle, carry only the systems you actually need, and test the complete load before departure.
Your next step is practical: pack the bicycle as if you were leaving tomorrow and take a local test ride. Then adjust the route or load based on what you learn and recheck campsite access, water, weather, closures, and regulations before the real overnight.
References:
- National Highway Traffic Safety Administration — Bicycle Safety: Bike Safety Tips for Kids and Adults
NHTSA Bicycle Safety - National Highway Traffic Safety Administration — Learn to Bike Safely
NHTSA Learn to Bike Safely - Adventure Cycling Association — No-Turn-Away Bike Camping Policies
No-Turn-Away Bike Camping Policies - Adventure Cycling Association — Top 10 Bicycle Camping Tips
Top 10 Bicycle Camping Tips - Adventure Cycling Association — Know the 7 Basics of Bike Camping
Know the 7 Basics of Bike Camping - REI Co-op Expert Advice — How to Plan a Bikepacking Route
How to Plan a Bikepacking Route - REI Co-op Expert Advice — How to Pack for Bikepacking
How to Pack for Bikepacking - Leave No Trace — The 7 Principles
Leave No Trace 7 Principles - Leave No Trace — Plan Ahead and Prepare
Plan Ahead and Prepare - Leave No Trace — Dispose of Waste Properly
Dispose of Waste Properly - National Weather Service — Lightning Safety When a Safe Building or Vehicle Is Nearby
NWS Outdoor Lightning Safety