
Menu Ideas for Camping Trip: A Simple 3-Day Meal Plan
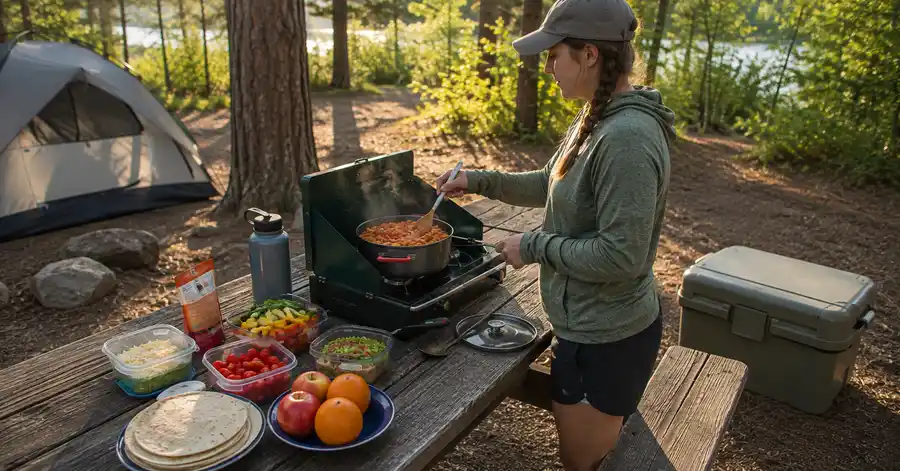
These menu ideas for camping trip planning are designed for a simple 3-day, 2-night frontcountry camping trip with a cooler and a camp stove. The goal is not elaborate campsite cooking. It is to arrive with a clear meal plan, reuse ingredients, keep food safely stored, and spend less time figuring out what to eat.
The sample plan below assumes you can keep perishable food at 40°F (4°C) or below and have a legal way to use a camp stove. Scale quantities for your group size, appetite, activity level, dietary needs, and the length of your travel days.
Table of Contents
The 3-Day Camping Meal Plan at a Glance
| Day | Breakfast | Lunch | Dinner | Snacks |
|---|---|---|---|---|
| Day 1 | Eat before leaving, or have a bagel with nut butter and a banana | Hummus-and-vegetable wraps with fruit | Make-ahead black bean taco filling with tortillas and simple toppings | Trail mix, crackers, whole fruit |
| Day 2 | Oatmeal with nut butter, banana or dried fruit | Tuna-pouch or chickpea wraps with crunchy vegetables | One-pot pasta with tomato sauce, vegetables, and white beans | Trail mix, fruit, crackers, snack bars |
| Day 3 | Make-ahead breakfast burritos, reheated safely; or bagels with nut butter and fruit | No-cook snack-style lunch with crackers, shelf-stable protein, fruit, and vegetables | Usually not needed for a 3-day/2-night trip; carry a shelf-stable backup dinner | Remaining fruit, trail mix, crackers |
Day 1: Keep Arrival-Day Food Easy
For lunch, use tortillas with hummus and pre-cut vegetables such as carrots, cucumber, or bell pepper. Keep hummus and cut produce properly chilled.
Dinner is a make-ahead black bean taco filling cooked at home, cooled promptly, packed cold, and reheated at camp. Serve it with tortillas and a few toppings that fit your cooler space. Choosing a cooked bean filling instead of handling raw meat at the campsite keeps the first evening simpler.
Day 2: Use the Full Camping Day for One Cooked Dinner
For breakfast, make oatmeal with nut butter, banana, or dried fruit.
Lunch can be a no-cook wrap. A shelf-stable tuna pouch works well if you eat the opened contents promptly. A vegetarian option is chickpeas prepared into a wrap filling and kept cold when required. Add vegetables already used elsewhere in the menu so you are not packing ingredients for only one meal.
For dinner, combine pasta, tomato sauce, chopped vegetables, and canned white beans in a simple one-pot meal. Use vegetables that also appear in the lunch wraps.
Day 3: Make Breaking Camp Simple
Make-ahead breakfast burritos can work well on the final morning if they were cooked, cooled, transported, and stored safely. Reheat leftovers to 165°F (74°C). If you do not want to manage another chilled prepared meal, use bagels, nut butter, oatmeal, and fruit instead.
For lunch, use remaining crackers, whole fruit, vegetables, and a shelf-stable protein such as an unopened tuna pouch. Avoid creating a final lunch that depends on leftovers whose cold-storage history is uncertain.
If your return is delayed, keep a shelf-stable backup dinner such as instant couscous with canned or pouched beans.
How to Use These Menu Ideas for Camping Trip Planning
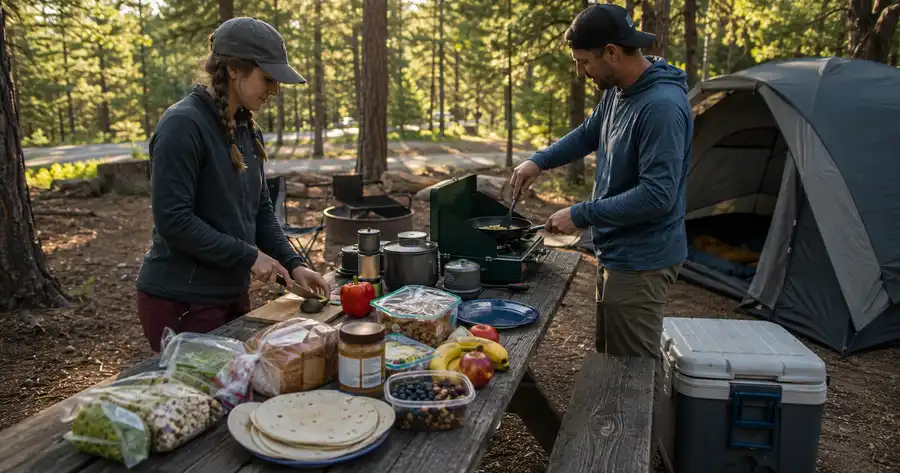
The useful part of a camping menu is not the number of recipes. It is how well the ingredients, preparation, cooler space, and campsite routine work together.
Day 1 Requires Almost No Camp Cooking
A reheatable dinner reduces chopping and cooking after check-in and campsite setup.
If you arrive too late to cook safely or legally, use the shelf-stable backup meal instead of trying to improvise with a campfire.
Ingredients Work Across Multiple Meals
Ingredient reuse reduces packing and food waste. In this plan:
- Tortillas work for lunch wraps, tacos, and breakfast burritos.
- Nut butter works with bagels, oatmeal, or snacks.
- Carrots and bell peppers work in wraps and pasta.
- Whole fruit covers breakfast sides and snacks.
- Beans appear in the taco filling, pasta, or backup dinner.
- Crackers and trail mix fill gaps without requiring cooking.
The Menu Does Not Depend on a Campfire
A campfire is not a reliable cooking system for an essential meal. Fires may be prohibited, restricted, unavailable, or impractical because of weather and campground rules.
This plan uses a camp stove for hot meals. Before departure, verify current fire and stove rules with the campground or land manager. If stove use is also restricted, switch to the no-cook alternatives and shelf-stable foods.
One Backup Meal Gives You Flexibility
Keep one simple shelf-stable backup dinner for a late arrival, weather change, or cooking problem.
Make-Ahead Camping Meals: What to Prep at Home
The easiest campsite meals often begin in your kitchen.
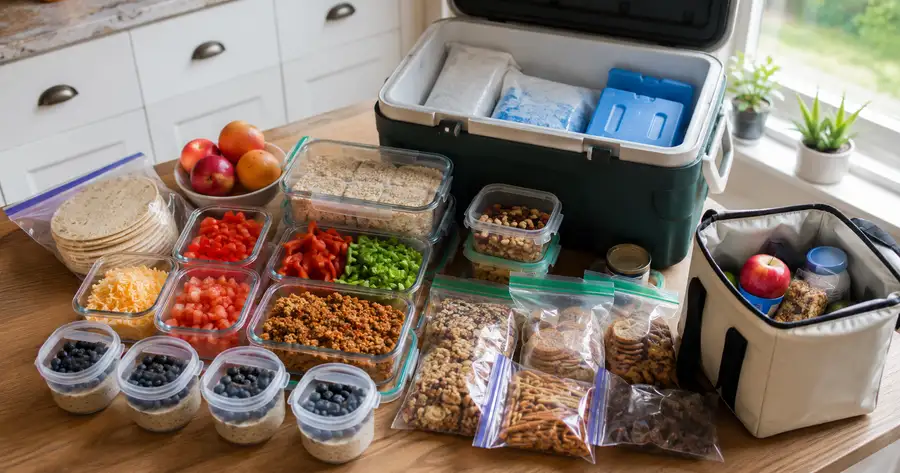
For this plan, preparation can follow a short sequence:
- Cook the black bean taco filling.
- Divide cooked food into shallow containers so it can cool promptly, then refrigerate it.
- Prepare breakfast burritos if you plan to use them.
- Wash whole produce and prepare vegetables you will need early in the trip.
- Portion oatmeal, pasta, seasonings, and trail mix.
- Pack small amounts of condiments rather than full-size containers when practical.
- Chill or freeze appropriate foods before loading the cooler.
- Separate cooler items from dry pantry food so you are not opening the cooler for crackers or oatmeal.
If you prepare a large batch of hot food at home, USDA recommends dividing it into smaller or shallow containers so it cools faster before refrigeration. Do not put a large hot pot directly into your camping cooler and expect the cooler to bring it safely down to refrigerator temperature.
How to Pack the Cooler Safely
USDA guidance says perishable foods should be kept at 40°F (4°C) or below. Bacteria grow rapidly between 40°F and 140°F (4°C and 60°C), often called the “Danger Zone.” Perishable food should not remain in that range for more than two hours, or more than one hour when the outside temperature is above 90°F (32°C).
Use these practices:
- Refrigerate or freeze food before departure.
- Use plenty of ice, frozen gel packs, or another reliable cold source.
- Pack the foods you will use later deeper in the cooler.
- Keep the cooler in the shade when practical.
- Open it only as long as necessary.
- Store food in watertight containers or sealed bags.
- If you bring raw meat in addition to this menu, keep it securely separated from ready-to-eat foods and below them so juices cannot drip onto other food.
- Consider a separate drink cooler if your group will open the beverage cooler frequently.
- Use a cooler thermometer if you need an objective way to check that the interior stays at or below 40°F.
If temperature control has been lost beyond the safe time limit, discard the food rather than judging safety by smell or appearance.
Camping Grocery List for the 3-Day Menu
Use the meal plan to build the grocery list, then scale amounts for your group.
Produce
- Bananas
- Apples, oranges, or another whole fruit
- Carrots
- Cucumber
- Bell peppers
- Optional additional vegetable for pasta
- Optional taco toppings that can be stored safely
Cooler Items
Depending on your exact version of the menu:
- Hummus
- Make-ahead black bean taco filling
- Prepared breakfast burritos
- Cheese or another perishable topping, if used
- Chilled chickpea filling, if prepared ahead
- Any other perishable ingredient you intentionally add
Bread, Tortillas, and Grains
- Tortillas
- Bagels
- Oatmeal
- Pasta
- Instant couscous or another quick-cooking backup grain
Shelf-Stable Proteins and Pantry Foods
- Nut or seed butter
- Canned black beans
- Canned white beans
- Tuna pouches or another shelf-stable protein
- Tomato sauce
- Olive oil
- Salt and simple seasonings
Snacks
- Trail mix
- Crackers
- Shelf-stable snack bars
- Whole fruit
Condiments and Small Extras
Choose only what the meals actually require.
No-Cook Camping Meal Swaps
No-cook camping meals are useful when you arrive late, want to reduce cleanup, or cannot use the stove.
Use bagels with nut butter and fruit for breakfast; tortillas or crackers with shelf-stable protein for lunch; and a simple tortilla, bean, cracker, and fruit combination for dinner.
Remember that no-cook does not mean no refrigeration. Hummus, cheese, deli meat, yogurt, prepared salads, cooked leftovers, and cut produce may still require cold storage even if you eat them without cooking.
Food and Water Safety at Camp
A camping food checklist should include safety tasks along with ingredients.
Keep Perishable Food Cold
USDA recommends holding cold perishable foods at or below 40°F. Return chilled ingredients to the cooler promptly instead of leaving the full meal supply on the picnic table while you cook.
The two-hour rule still applies at camp, and it becomes a one-hour rule when the outdoor temperature is above 90°F.
Prevent Cross-Contamination
Wash hands before preparing food. Keep clean utensils and plates separate from anything that has contacted raw meat, poultry, or their juices.
This sample menu deliberately minimizes raw-meat handling, but if you add meat, follow safe separation and cooking practices. Do not reuse a plate that held raw food for cooked food unless it has been washed properly.
Cook and Reheat Food Safely
Use a food thermometer for temperature-sensitive foods rather than relying on color or texture.
USDA recommends reheating leftovers to 165°F (74°C). If you add raw animal proteins to the menu, follow the safe minimum internal temperature for that specific food instead of assuming one temperature applies to everything.
Verify Your Water Source
Do not assume campground water is potable simply because there is a faucet, and do not assume clear stream or lake water is safe to drink.
CDC advises treating water when you are not sure it is safe. Boiling is the best method for killing germs; CDC says the next best option is to filter the water and then disinfect the filtered water. Follow current CDC instructions and the directions for any treatment product you use.
Follow Local Wildlife Food-Storage Rules
Food-storage requirements vary by campground and park.
The National Park Service notes that food, garbage, coolers, cooking equipment, toiletries, and other scented items may all fall under food-storage rules. Some places require lockers or approved bear-resistant containers, while rules elsewhere differ.
Check the specific campground or land manager before departure. Do not assume that keeping food in a tent, leaving a cooler on the picnic table, or using one generic bear-storage method is acceptable everywhere.
How to Adjust the Meal Plan for Your Trip
For More Campers
Multiply meal components based on the number of people who will actually eat them, then adjust for appetite and activity. Check whether your cooler, stove, cookware, and food-storage system still have enough capacity before simply doubling every ingredient.
For a Longer Trip
Do not automatically multiply all chilled foods. Add more shelf-stable meals and reassess how long you can reliably maintain cold temperatures.
For Hot Weather
Hot conditions make cold storage more demanding. Use more shelf-stable foods, keep the cooler shaded, reduce unnecessary opening, and follow the shorter one-hour limit for perishable food exposed to temperatures above 90°F.
For Limited Cooler Space
Prioritize ingredients used in several meals. Swap some chilled items for whole fruit, shelf-stable protein, unopened canned foods, nut or seed butter, oats, crackers, and other foods that do not require refrigeration before opening.
For Dietary Preferences
Check ingredient labels and cross-contact risks when food allergies or medically required diets are involved; a general camping menu cannot determine what is safe for a specific person.
Common Camping Meal-Planning Mistakes
Avoid these common problems:
- Shopping before deciding what meals you will actually cook.
- Planning the most complicated dinner for arrival night.
- Packing many ingredients that appear in only one recipe.
- Depending on a campfire for essential cooking.
- Bringing perishables without a reliable cold-storage plan.
- Assuming the campground has potable water.
- Forgetting a shelf-stable backup meal.
- Packing more food than the group is likely to eat.
- Ignoring local wildlife food-storage requirements.
- Forgetting the can opener, stove fuel, pot, utensils, or other equipment a planned meal requires.
Quick Camping Food Checklist Before You Leave
Before leaving home, confirm that:
- Your 3-day camping meal plan is finalized.
- Grocery quantities match your group.
- Make-ahead food has been cooked, cooled, and chilled safely.
- Cooler food is cold or frozen before packing.
- You have enough ice or frozen cold sources.
- The camp stove and fuel are ready and permitted at your destination.
- Required cookware, utensils, and a can opener are packed.
- A food thermometer is packed when your meals require temperature checks.
- Potable water is confirmed or you have a safe backup plan.
- Current fire and stove restrictions have been checked.
- Current wildlife food-storage rules have been checked.
- A shelf-stable backup meal is packed.
- Trash bags and food-storage containers are ready.
Frequently Asked Questions
What are good menu ideas for camping trip planning?
Good menu ideas for camping trip planning use simple meals that share ingredients and match your cooler and cooking setup. For three days, try oatmeal or bagels for breakfast, wraps for lunch, a make-ahead taco dinner on arrival night, one-pot pasta on the second night, plus fruit, trail mix, and a shelf-stable backup meal.
What food should I bring for a 3-day camping trip?
Start with a complete meal plan instead of a general food list. Pack enough breakfast, lunch, dinner, and snacks for the meals you will actually eat, then add water and one backup meal. Your exact foods should match group size, dietary needs, cooler capacity, stove access, weather, and planned activities.
What camping meals can I make ahead of time?
Black bean taco filling, chili, cooked pasta components, and breakfast burritos can all reduce campsite preparation. Foods cooked ahead must still be cooled promptly, transported cold, and stored at 40°F or below when they are perishable. Reheat leftovers to 165°F before serving.
What camping meals do not need a cooler?
Unopened shelf-stable foods can include nut or seed butter, crackers, tortillas, oats, trail mix, canned foods, tuna pouches, dried fruit, and many whole fruits and vegetables. Always check the product label. A meal can be “no-cook” yet still need refrigeration if it contains hummus, cheese, deli meat, yogurt, or cooked leftovers.
How do I keep food cold for a 3-day camping trip?
Pre-chill or freeze food, pack the cooler with plenty of ice or frozen gel packs, keep it shaded, minimize opening, and monitor the interior so perishables remain at 40°F or below. For a longer warm-weather trip, plan an ice resupply or rely more heavily on shelf-stable foods rather than assuming the original ice will last.
Conclusion
These menu ideas for camping trip planning work because the meals are connected: ingredients repeat, arrival-night cooking is minimal, the grocery list follows the menu, and food-safety needs are considered before packing.
Start by scaling the meals to your group. Then prepare the make-ahead components, separate cooler foods from shelf-stable groceries, pack one backup meal, and verify potable water, stove or fire rules, and wildlife food-storage requirements for your campground before you leave.
References:
- U.S. Department of Agriculture, Food Safety and Inspection Service — Food Safety While Hiking, Camping & Boating
Direct working URL - U.S. Department of Agriculture, Food Safety and Inspection Service — Leftovers and Food Safety
Direct working URL - U.S. Department of Agriculture, Food Safety and Inspection Service — Keep Food Safe! Food Safety Basics
Direct working URL - Centers for Disease Control and Prevention — About Water Treatment Options When Hiking, Camping, or Traveling
Direct working URL - National Park Service — Bear Safety: Storing Food
Direct working URL