
How to Tie Basic Knots for Camping: 7 Easy Knots
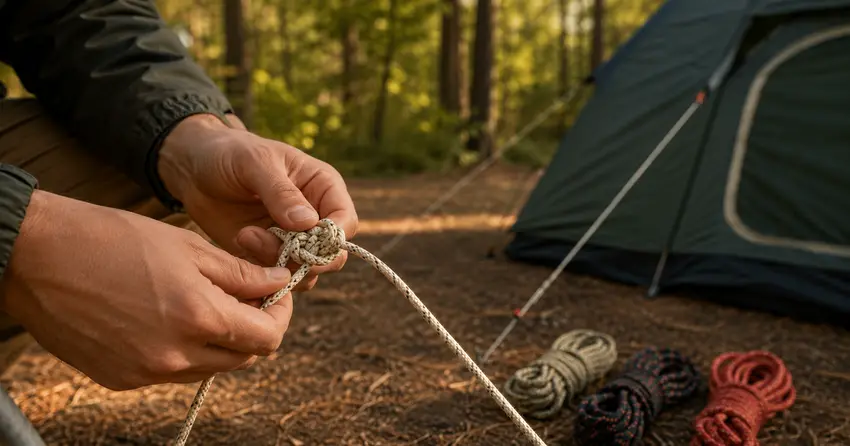
Learning how to tie basic knots for camping can make tent setup, tarp pitching, and other everyday campsite jobs much easier. You do not need to memorize dozens of knots. Seven practical knots can cover common tasks such as making a stopper, bundling light gear, creating a fixed loop, anchoring a line, adjusting a guyline, and tensioning a tarp.
This guide is designed for beginners and ordinary campsite use. It does not replace qualified instruction for climbing, rappelling, rescue work, hammock suspension, or professional load securing.
Table of Contents
How to Tie Basic Knots for Camping: Start With These 7
Here is the simplest way to think about the seven knots before learning the steps:
| Knot | Best Camping Use | Adjustable? | Difficulty |
|---|---|---|---|
| Overhand knot | Stopper or simple backup | No | Very easy |
| Square knot | Light-duty bundling | No | Easy |
| Round turn and two half hitches | Attaching a line to an anchor | No | Easy |
| Bowline | Creating a fixed loop | No | Easy |
| Clove hitch | Quick temporary attachment | Limited | Easy |
| Taut-line hitch | Adjusting a tent guyline | Yes | Easy–moderate |
| Trucker’s hitch | Tensioning a tarp or utility line | During setup | Moderate |
If you only practice a few at first, start with the bowline, taut-line hitch, and round turn with two half hitches. Those three handle several of the most common jobs around a campsite.
Learning how to tie basic knots for camping is easier when you connect each knot to a specific task instead of memorizing names in isolation.
Basic Knot-Tying Terms to Know
A few rope terms make knot instructions much easier to follow:
- Working end: The free end you move while tying.
- Standing part: The longer section of rope that is not being actively moved.
- Bight: A U-shaped bend that does not cross over itself.
- Loop: A section of rope that crosses over itself to form an enclosed shape.
- Turn: A wrap around an object.
- Hitch: A knot used to attach a rope to an object or another rope.
You may also see the instruction to dress the knot. This means arranging the strands neatly, removing unnecessary twists and slack, and making sure the finished knot has the intended shape before tightening it.
When learning how to tie basic knots for camping, use a short piece of easy-to-handle cord and practice slowly. Being able to recognize a correctly dressed knot is more useful than tying it quickly but inconsistently.
1. Overhand Knot — A Simple Stopper
The overhand knot is one of the easiest basic camping knots. It is useful as a simple stopper or backup in appropriate light-duty situations, and it also helps beginners become comfortable handling the working end and standing part. Scouting America describes the overhand knot as one of the simplest basic knots and notes that it can become difficult to untie after being put under strain.
How to Tie an Overhand Knot
- Make a loop near the working end.
- Pass the working end through the loop.
- Pull the working end and standing part in opposite directions.
- Dress the knot so it sits neatly and compactly.
When to Use It
An overhand knot can help keep a rope end from passing through an opening when the setup allows it. It is also useful for practicing basic rope handling.
One limitation is that an overhand knot can become difficult to untie after being heavily loaded.
2. Square Knot — For Light-Duty Bundling
The square knot, also called a reef knot, is mainly a binding knot. Around camp, it can be useful for tying cord around a light bundle or keeping appropriate non-critical items together. Scouting America similarly describes the square knot as a binding knot and cautions against using it to hold a heavy load.
It should not be treated as a general-purpose knot for heavy or critical loads.
How to Tie a Square Knot
- Hold one working end in each hand.
- Cross the right end over the left and pass it underneath.
- Cross the end now on the left over the end now on the right.
- Pass it underneath.
- Pull the ends evenly and dress the knot.
A common memory aid is “right over left, left over right,” but learn to recognize the finished knot rather than relying only on the phrase.
Avoid Accidentally Tying a Granny Knot
A square knot should lie flat, with the working ends exiting in line with the standing parts. Repeating the same crossing direction twice produces a granny knot instead.
Use a square knot for light binding jobs, not climbing, rescue, or any task where failure could cause injury.
3. Round Turn and Two Half Hitches — For an Anchor Point
A round turn with two half hitches is useful for attaching a utility line to a suitable post, pole, ring, or similar fixed anchor. It is also included among the standard rope knots in the 2026 U.S. Antarctic Program Peninsula Field Manual.
The round turn places rope around the anchor before the half hitches secure the working end to the standing part.
How to Tie a Round Turn and Two Half Hitches
- Pass the working end around the anchor.
- Continue around the anchor once more to complete a round turn.
- Bring the working end around the standing part.
- Pass it through the loop you just created to form the first half hitch.
- Repeat in the same direction to create the second half hitch.
- Dress the hitches neatly and tighten them.
When to Choose This Camping Knot
Choose it when you need a straightforward attachment to an anchor and do not need continuous adjustment.
If you need to change guyline tension frequently, a taut-line hitch is usually more convenient.
4. Bowline Knot — For Making a Fixed Loop
The bowline knot creates a fixed loop at the end of a rope. Unlike a sliding loop, the main loop does not simply cinch smaller when you pull on the standing part.
Scouting America describes the bowline as a knot that forms a fixed loop, which is why it is useful for many ordinary campsite utility tasks where you want a loop of a chosen size.
How to Tie a Bowline Knot
- Make a small loop in the standing part, leaving enough working end to finish the knot.
- Pass the working end up through the small loop.
- Take the working end around the back of the standing part.
- Bring the working end back down through the original small loop.
- Hold the large loop while pulling on the standing part to dress and tighten the knot.
How to Check a Bowline
The finished knot should create one fixed main loop. The working end should be captured around the standing part, and the strands should lie neatly without accidental twists.
Leave a generous tail for ordinary campsite use and inspect the knot before loading it.
A bowline is also used in technical outdoor disciplines, but this beginner camping guide is not climbing or rescue instruction.
5. Clove Hitch — For a Fast Temporary Attachment
The clove hitch is a quick way to attach a line around a suitable pole or similar object. It can also be useful when starting some simple camp lashings. Scouting America describes the clove hitch as a way to secure a line to a pole and to begin or finish several types of lashings.
Its main advantage is convenience. It should not be assumed to be the right choice for every anchor.
How to Tie a Clove Hitch Around an Object
- Wrap the working end around the object once.
- Cross the working end over the standing part.
- Continue the working end around the object a second time.
- Tuck the working end beneath the diagonal crossing section.
- Pull both ends to dress the hitch snugly.
The finished clove hitch has two turns around the object with a diagonal section crossing between them.
When a Clove Hitch Is Not the Best Choice
Changing tension, smooth surfaces, and certain anchor shapes can affect how a clove hitch behaves.
U.S. Forest Service guidance specifically describes the clove hitch as a temporary attachment and states that it is not suitable for life support.
For important campsite attachments, choose a knot based on the actual load and whether tension will remain steady.
6. Taut-Line Hitch — One of the Best Knots for Tent Guylines
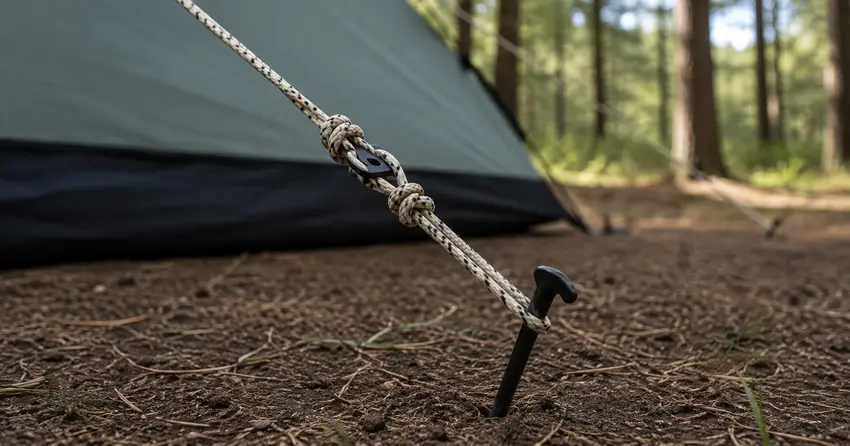
A taut-line hitch is especially useful for tent guylines because the hitch can slide along the standing part for adjustment when tension is reduced, then grip when the line is tensioned. That allows you to tighten or loosen a guyline without untying the entire system.
Scouting America identifies the taut-line hitch as one of the more practical camping knots and includes it in tent-setup training.
For beginners learning how to tie basic knots for camping, this is one of the most useful knots to practice before a trip.
How to Tie a Taut-Line Hitch
- Pass the working end around the tent stake or suitable anchor.
- Bring the working end around the standing part and through the space between the hitch and the stake.
- Make a second wrap around the standing part inside that same space.
- Take the working end around the standing part once more outside the first two wraps.
- Dress all three wraps so they sit neatly.
- Slide the completed hitch along the standing line to adjust the guyline.
- Retension the line and check that the hitch grips.
This common configuration uses two wraps on the inside and one finishing wrap on the outside.
How to Adjust a Tent Guyline
Reduce tension slightly before trying to slide the hitch. Move it toward or away from the stake until the guyline has the tension your shelter requires, then check the stake and shelter attachment point.
Do not pull every guyline as tight as possible. Excessive tension can stress fabric loops, stakes, poles, or other components.
If your tent includes built-in or separate line tensioners, following the manufacturer’s setup instructions may be easier than replacing them with a knot.
7. Trucker’s Hitch — For Tensioning a Tarp or Utility Line
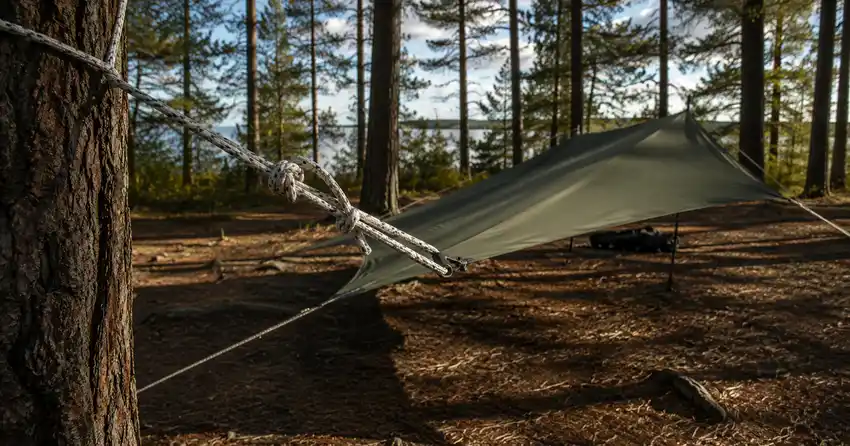
The trucker’s hitch is useful when you need more tension than you can comfortably create by simply pulling a line and tying it off. Its arrangement provides mechanical advantage before the working end is secured. The U.S. Antarctic Program field manual includes the trucker’s hitch in its rope-use guidance.
For camping, it can be helpful on an appropriate tarp line or other non-critical utility line.
How to Tie a Trucker’s Hitch
Several variations exist. For a simple camping version:
- Secure one end of the rope to the first suitable anchor.
- Form a small fixed loop in the standing part before the second anchor.
- Take the working end around the second anchor.
- Pass the working end through the fixed loop.
- Pull the working end back toward the second anchor to create tension.
- Maintain the desired tension and secure the working end with an appropriate finishing hitch, such as two half hitches.
- Dress the system and inspect the anchors, line, and tarp attachment points.
Avoid Over-Tensioning
The mechanical advantage of a trucker’s hitch makes it easy to apply more force than lightweight camping equipment needs.
Use enough tension to stabilize the setup, not maximum possible tension. Too much force can damage tarp loops, fabric, poles, stakes, cord, or an unsuitable anchor.
This camping application should not be treated as professional cargo-rigging instruction.
Which Camping Knot Should You Use?
You do not need to decide which knot is “best” overall. Match the knot to the job:
- Need a simple stopper? Use an overhand knot.
- Need to bind a light bundle? Use a square knot.
- Need to attach a rope to a suitable anchor? Use a round turn and two half hitches.
- Need a fixed loop? Use a bowline.
- Need a quick temporary attachment? Use a clove hitch.
- Need an adjustable tent guyline? Use a taut-line hitch.
- Need to tension a tarp or utility line? Use a trucker’s hitch.
Understanding the purpose of each knot is a better strategy than trying to use one knot for every campsite task. Once you understand how to tie basic knots for camping, choosing the right knot becomes much more intuitive.
How to Tie Basic Knots for Camping Without Common Mistakes
The most common problems are usually not about speed. If you are learning how to tie basic knots for camping, accuracy matters more than tying quickly. Most errors come from choosing the wrong knot, tying the correct knot incorrectly, or failing to inspect the finished result.
Watch for these mistakes:
- Learning too many knots at once. Master a small useful group before adding more.
- Confusing a square knot with a granny knot. Inspect how the finished ends lie.
- Leaving a knot poorly dressed. Remove unnecessary twists and slack before loading it.
- Leaving very short working ends. A reasonable tail makes the finished knot easier to inspect.
- Assuming every cord behaves identically. Diameter, construction, stiffness, surface texture, moisture, and wear can change how a knot or hitch performs.
- Ignoring damaged cord. Replace rope or utility cord with serious cuts, melted areas, heavy abrasion, or other obvious damage.
- Using a fixed knot when adjustability is needed. Tent guylines often need retensioning.
- Over-tightening a tarp or tent. More force is not automatically better.
- Using camping instructions for life-safety systems. Climbing and rescue require specialized techniques, rated equipment, and qualified training.
How to Tie Basic Knots for Camping Before Your Trip
Practice is much easier at home than in the dark, rain, wind, or cold at a campsite.
Use a short length of visible, easy-to-handle rope or cord and follow this routine:
- Tie the knot slowly while following the instructions.
- Dress the knot and inspect its final shape.
- Untie it completely.
- Tie it again without looking at the instructions.
- Practice knots such as the clove hitch and taut-line hitch around a safe practice anchor.
- Repeat the bowline and trucker’s hitch until you understand where every strand goes.
- Practice untying each knot after applying moderate hand tension.
If you are trying to learn how to tie basic knots for camping efficiently, memorize them by function rather than name: stopper, binding knot, anchor hitch, fixed loop, temporary attachment, adjustable guyline hitch, and tensioning system.
Camping Knot Safety and Rope Care
Inspect your cord before every trip and replace it if you find serious cuts, melted fibers, severe abrasion, or other obvious damage.
Keep tent guylines and utility lines visible and within your campsite whenever possible. Reflective cord can make guylines easier to notice after dark, but thoughtful campsite layout remains important.
Avoid wrapping thin, highly tensioned cord around living trees where it can damage bark. Rules on attaching ropes, hammocks, tarps, and other equipment to trees can also vary between parks and campgrounds, so check the regulations for the specific place where you are staying.
Knowing how to tie basic knots for camping does not make ordinary utility cord suitable for every purpose. Most importantly, do not assume ordinary utility cord or a familiar camping knot is appropriate for supporting a person.
Climbing, rappelling, rescue systems, and other technical rope applications require purpose-rated equipment and qualified instruction.
Frequently Asked Questions
What are the most essential camping knots for beginners?
A useful beginner set includes the bowline, taut-line hitch, clove hitch, round turn with two half hitches, overhand knot, square knot, and trucker’s hitch. Together they cover fixed loops, adjustable guylines, temporary attachments, anchor points, light bundling, simple stoppers, and tarp tensioning.
What is the best knot for a tent guyline?
A taut-line hitch is one of the most practical tent rope knots when you want an adjustable guyline. It can slide when tension is reduced and grip when properly dressed and tensioned. If your tent already includes line tensioners, use them according to the manufacturer’s instructions.
What knot should I use to secure a camping tarp?
It depends on where the knot is used. A bowline can create a fixed loop, a round turn with two half hitches can secure a line to an appropriate anchor, and a trucker’s hitch can help tension an appropriate tarp line.
Avoid putting excessive force on lightweight tarp attachment points.
Is a bowline better than a clove hitch for camping?
Neither is universally better. A bowline makes a fixed loop, while a clove hitch creates a fast temporary attachment around an object.
When learning how to tie basic knots for camping, focus on choosing the knot that matches the job rather than searching for one knot that handles everything.
Can these camping knots be used for climbing?
Do not use this camping tutorial as climbing instruction. Some of these knots also appear in climbing or rescue systems, but technical applications depend on specific ropes, hardware, backups, loading conditions, inspection procedures, and training.
Learn technical rope systems from a qualified instructor using purpose-rated equipment.
Conclusion
Learning how to tie basic knots for camping does not require memorizing a long knot book. These seven knots give beginners a practical toolkit for common campsite tasks, from adjusting guylines to making fixed loops and tensioning tarp lines.
Practice them with spare cord before your next camping trip. Once you can tie, dress, inspect, and untie each knot confidently, you will be better prepared to choose the right one when setting up camp.
References:
- Scouting America — Basic Knots, Troop Leader Resources. Basic Knots
- Scouting America — Basic Adult Leader Outdoor Orientation (BALOO). BALOO Knot Training Guide
- U.S. Forest Service — National Tree Climbing Guide, 2015 Electronic Edition. National Tree Climbing Guide
- United States Antarctic Program — USAP Peninsula Field Manual 2026. USAP Peninsula Field Manual 2026